CMS using MEVN Stack (Mongo, ExpressJS, and VueJS)
I am going to introduce an awesome CMS based on MEVN Stack (i.e. MongoDB, ExpressJS, Vue.JS and Node.JS) called Factor.dev
I am going to introduce an awesome CMS based on MEVN Stack (i.e. MongoDB, ExpressJS, Vue.JS, and Node.JS) called Factor.dev
If you are a developer then you probably have worked on a CMS (most probably WordPress). If you are a Node.JS developer(like me) then probably you have longed for WordPress-like (or better), extensible, easy to configure, production-ready CMS. Yes, the wait is over!! Introducing Factor.dev
In this post, I am going to give you simple steps in order to get started with Factor.dev and create a real blog.
Prerequisites
You need to have the latest version of NodeJS and NPM installed on your machine. MongoDB is optional but recommended.
Creating a Simple Blog using Factor.dev
Step 1
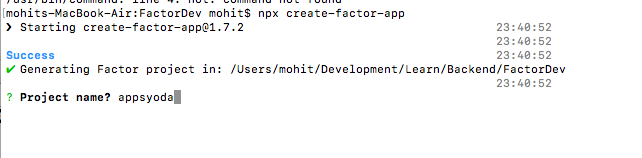
Open Terminal and run this command. This will bootstrap a new Factor app in your current folder.
npx create-factor-app
Enter your project name as shown in the screenshot
If you face an error like npx command not found, then you need to execute the following command in terminal:
For Windows:
npm i -g npx
For MacOS / Linux / Unix
sudo npm i -g npx
If everything goes well, then it will give you a success message like this
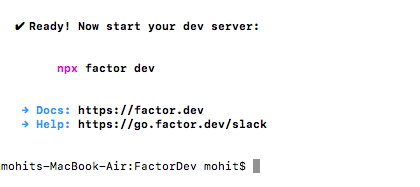
Factor Project is now ready
Step 2: Start the project and setup
As indicated in the last screenshot, start your dev server using the following command
npx factor dev
This will start up the server by default on port 3000. You will be automatically redirected to localhost:3000/setup screen as shown below
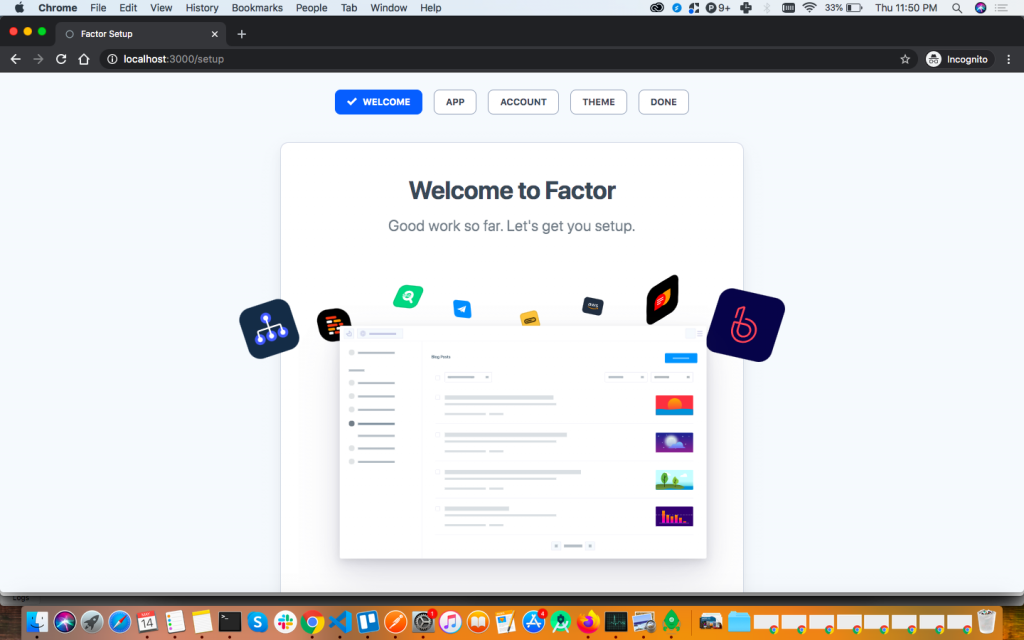 Factor.dev Setup Screen
Step 2.1: Click on the Start button. It will ask you about the project details as shown below.
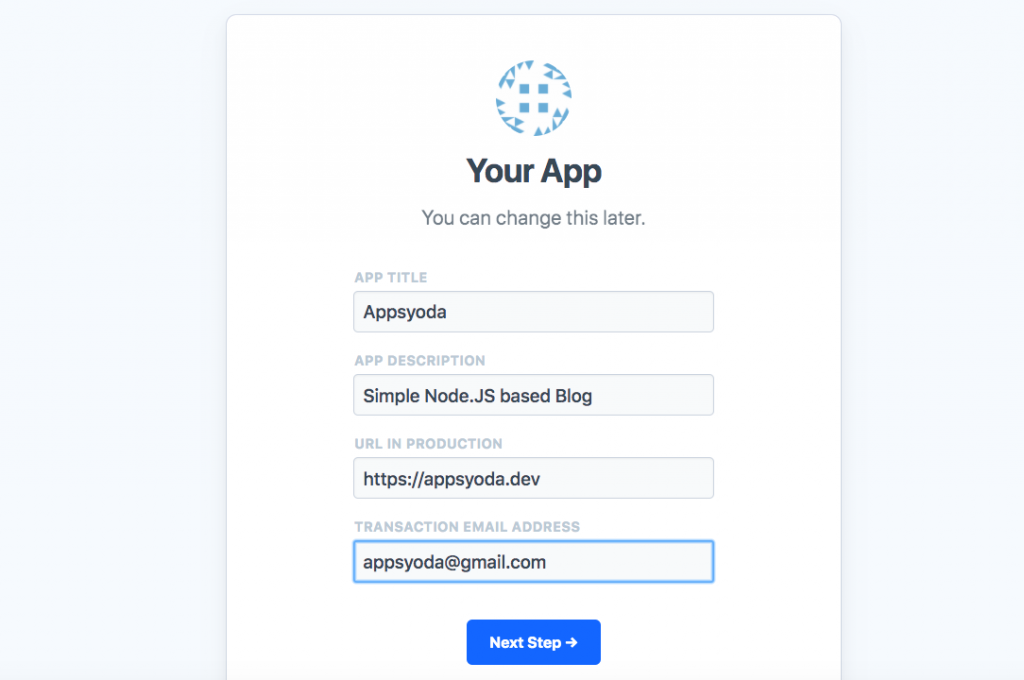 Factor.Dev Project Details
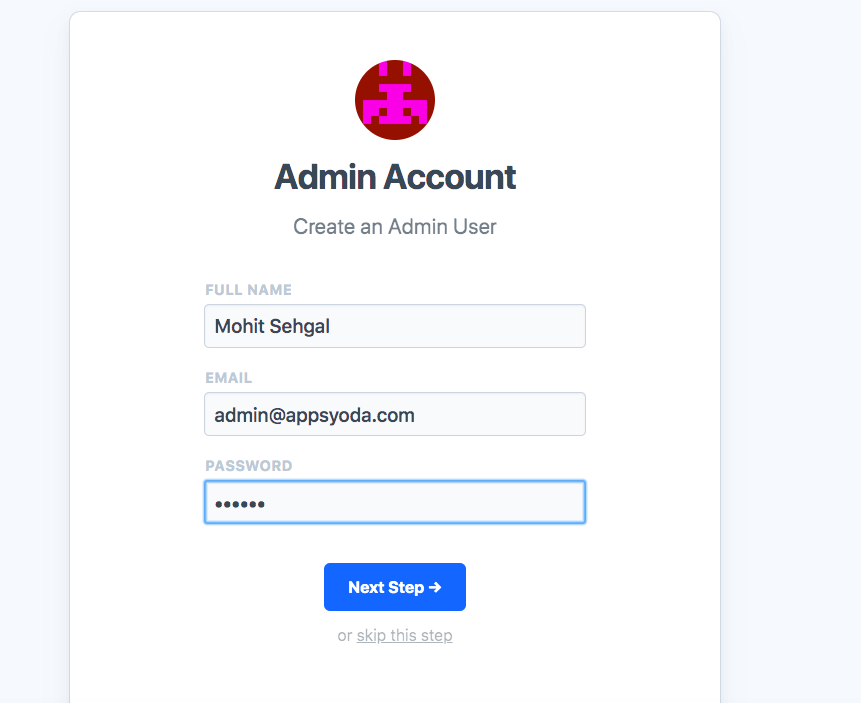
Step 2.2: Next, you can create an initial admin account as shown below. These credentials will be used by default in order to manage the CMS after setup.
Step 3: Choose the theme.
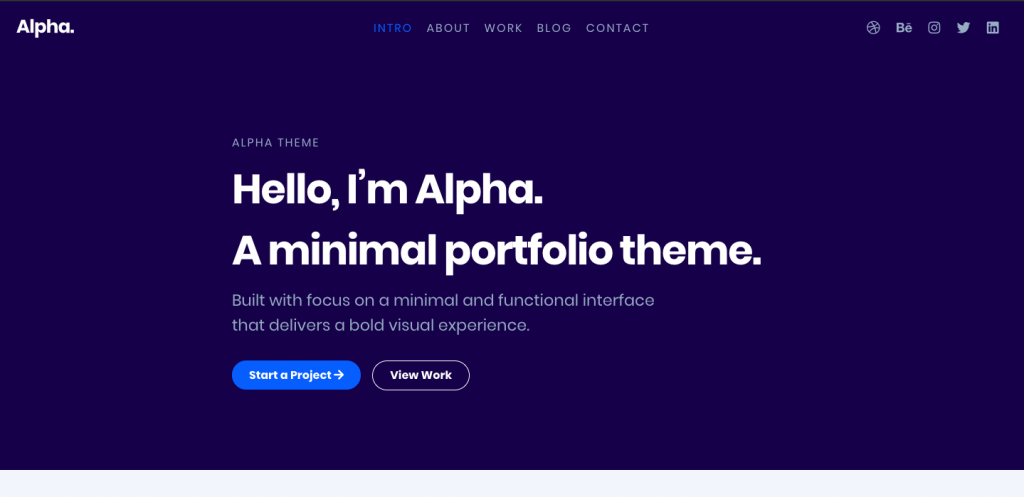
You can choose from ready-made, mobile-friendly themes namely Zeno, Alpha, and Ultra (at this time of writing Factor.dev provides 3 themes). You can also customize these themes and make it your own 😎
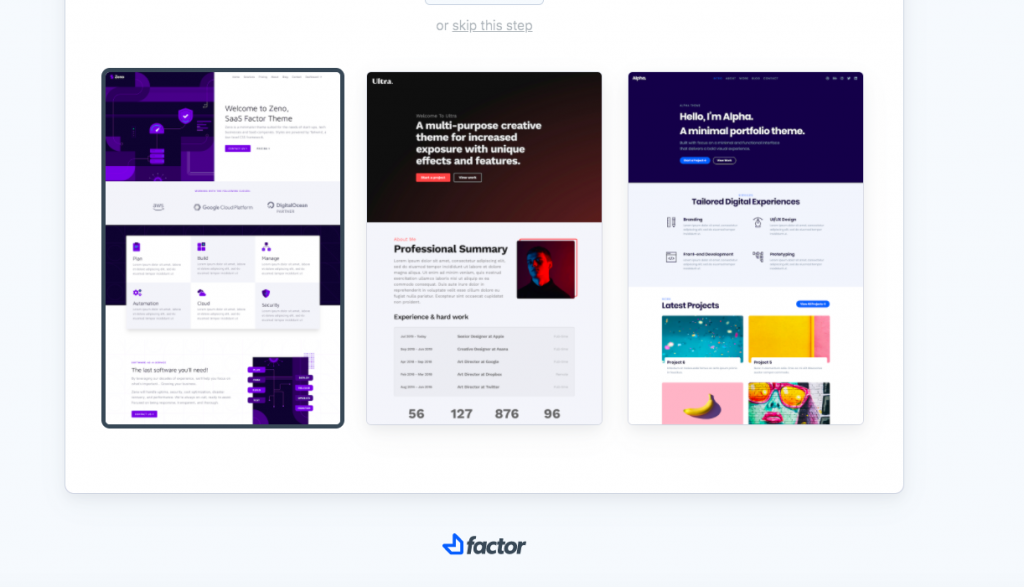
Default Themes available in Factor.Dev I am choosing Alpha for this demo.
Once you are done it will show you a confirmation screen that setup is done.
Click on Save Config and Build App. Now all dependencies of the project will get installed.
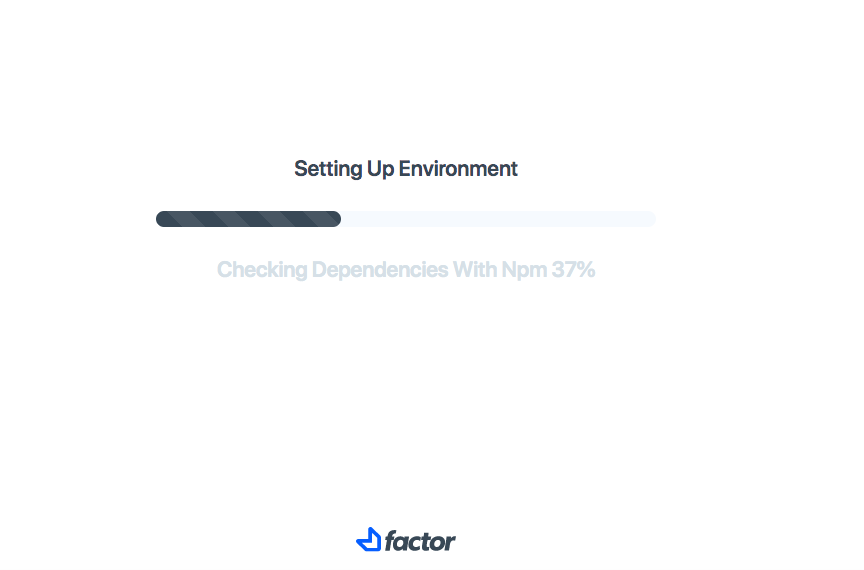
Setting up Dependencies for Factor.dev project
Once the build is complete, it will present you with the home page of the newly created app like this
Explore the new project.
Step 4: Setup the MongoDB Connection
Now you need to open the folder where you initiated your project in your favorite IDE.
Open .env file.
FACTOR_ADMINS = 'mohit@appsyoda.dev'
DB_CONNECTION = 'mongodb://localhost/appsyodadev'
TOKEN_SECRET = 'This is my JWT secret'
This goes without saying that, MongoDB should be running on your localhost and your connection string should be a valid Mongoose compatible connection URL.
You can optionally add SMTP credentials in this file. These credentials would be used to send administrative and transactional emails from this app. Here are the keys which might be useful for you.
# -- Email - Transactional e.g. "forgot password"
# SMTP_USERNAME="<SMTP USERNAME - ANY SMTP PROVIDER>"
# SMTP_PASSWORD="<SMTP PASSWORD - ANY SMTP PROVIDER>"
# SMTP_HOST="<SMTP HOST - ANY SMTP PROVIDER>"
Step 5: Setup your admin account
You need to close the terminal command and re-run npx factor dev to restart.
Visit the dashboard URL http://localhost:3000/dashboard/account. Click on Signup.
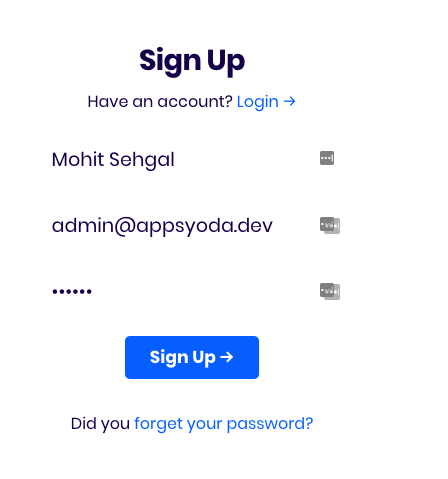
This will take you to your account page. If you added SMTP credentials earlier, then you’ll receive a verification email.
You can see the record in MongoDB using Robo3T. Open your database, it will have 1 collection named posts and it will have 1 record like this.
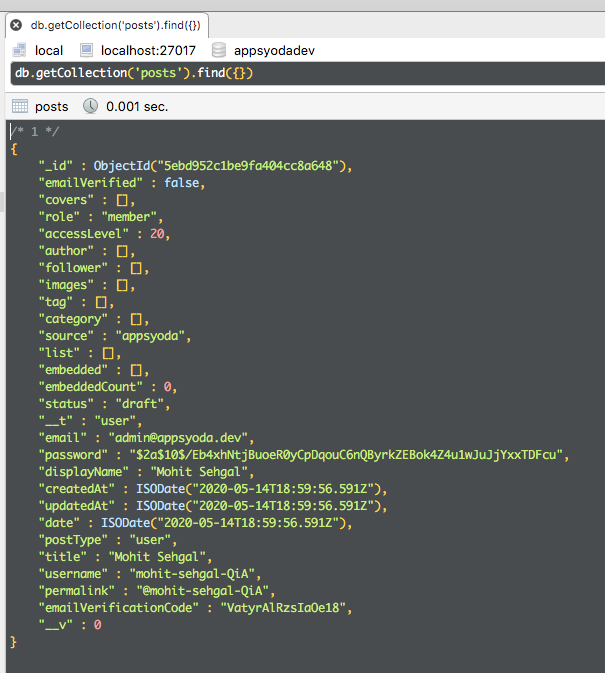
You can edit this record and set emailVerified to the true, role to admin, and accessLevel to 500. More on this in a future post.
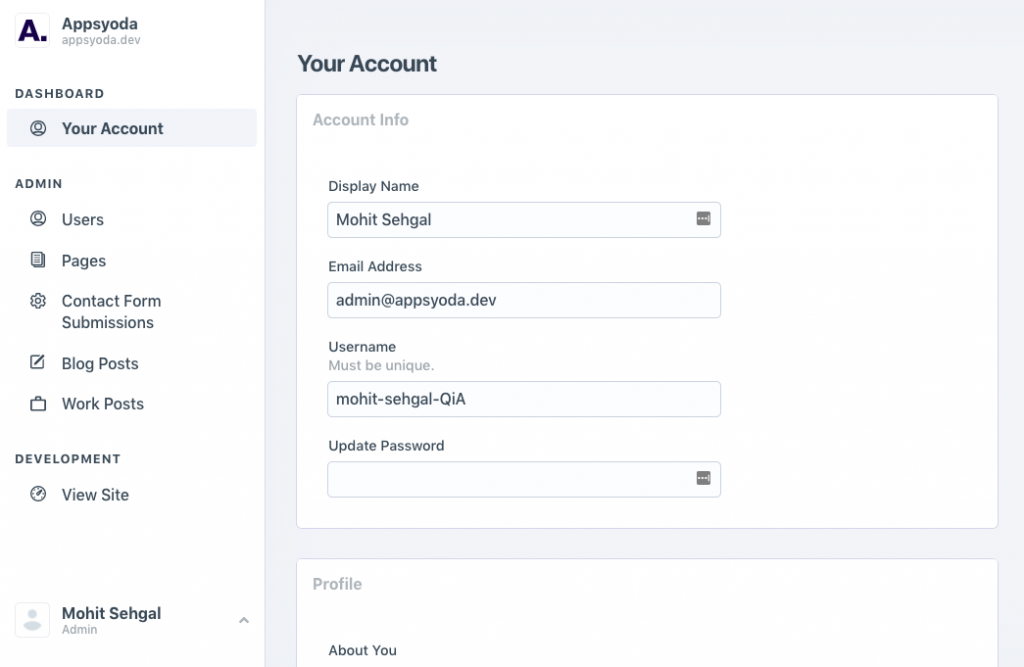
Once you are done, come back to Factor Dashboard and refresh.
You’ll see the admin-dashboard with various options and a very familiar sidebar in a CMS setup.
Step 6: Start Customizing and Adding content to your new blog
Once you reach here, you can update your profile, add new pages, add blog posts, view the contact page submissions, manage users, and much more.
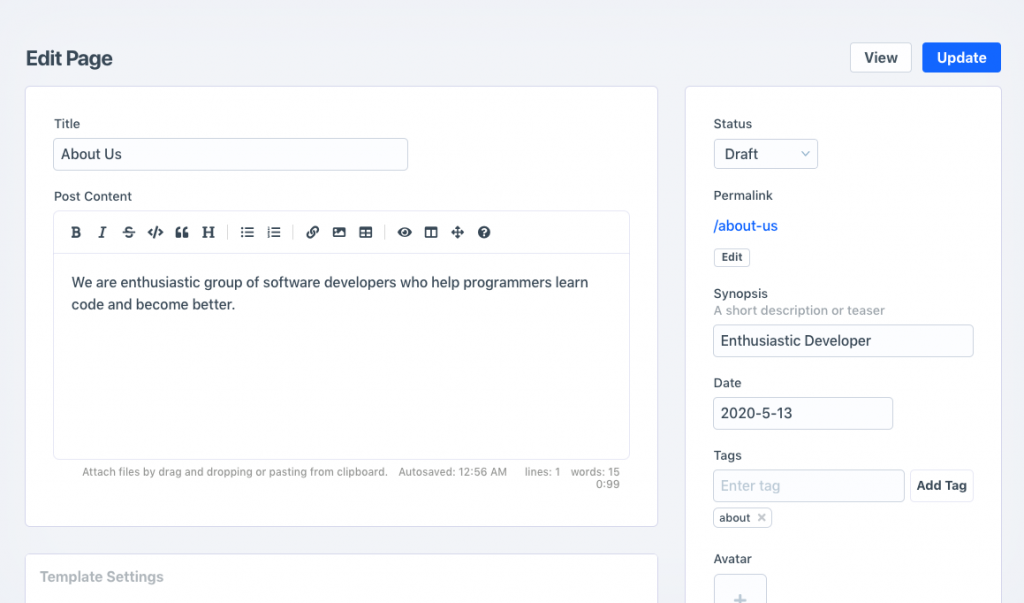
Let's try adding a new page to our site. Click on Pages > Add New. This opens a very intuitive UI to add content to your new page.
Apart from adding title and content, you can edit permalink, add tags, add short synopsis, edit author, and more.
In the same way you can add blog posts to your new Javascript-based CMS.
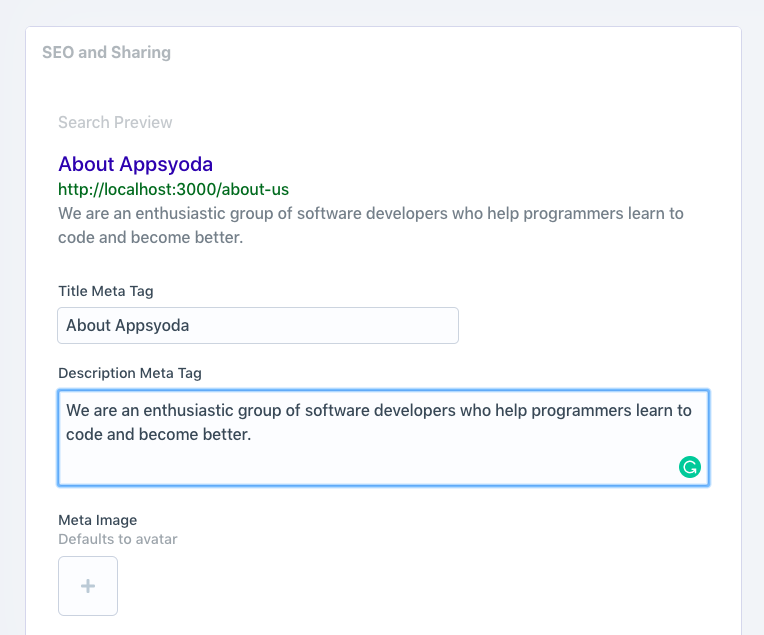
Moreover, It gives you SEO Settings out of the box. No need to install any plugin or pay for it. Wow!!
And as you make changes you can preview the changes using the "View Site" option.
Conclusion
In this post, you created a new Node.JS-based CMS project using an exciting new framework called Factor.dev. In the next posts, we will talk about various other aspects of Factor.dev CMS such as customizing the functionality of existing theme and extending the functionality using plugins.
If you have any questions, doubts, or suggestions, kindly leave a comment below or contact me directly. Thanks for your time.

WRITTEN BY
Mohit Sehgal
Want to positively impact the world. Full Stack Developer, MEVN Stack (MongoDB, Express.js, Vue.js, Node.js)